Posted on July 26th, 2022
It’s a proven fact that adding compost to your garden will provide positive outcomes across the board. Composting will improve your plants’ overall health and looks. By composting your organic waste, you help your garden, the planet, and your wallet. When the decomposed material is added to soil, it adds valuable nutrients that improve its quality and structure. When compost is placed in a garden, air can circulate more efficiently throughout the soil. It also allows for water to be retained for more extended periods of time. When people send organic food trash or yard debris to the dump it harms the environment. Transportation to a waste center requires CO2 and the landfills themselves produce massive amounts of methane gas emissions. If you make your own compost you will save money by not having to buy fertilizers. Your gardens will improve as your soil retains more moisture, so you don’t have to water as often.
Here are some ways you can make your own compost at home and start improving your soil’s health in no time! Pick an option that’s best for you and one you think will align with your specific needs and space.

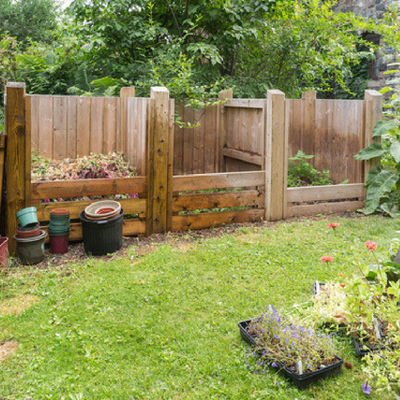
When composting in open bins, you typically arrange three boxes side by side for the process of decomposition. The sizes of your bins and the material you build them out of can vary depending on your budget and how fancy you would like it to look. Usually, the first box is where you place all your fresh organic material or yard waste. After about 2-3 weeks you transfer this to the middle bin and turn it over, ensuring oxygen gets in to help with the process. After another 2-3 weeks, you place that material to the final bin on the right and will have a finished product you can put in your garden or wherever you please. Since these bins are open, it’s easier to turn and flip your material which speeds up the process of decomposition.
One of the most popular methods to compost is by using a closed bin. A closed bin is exactly what it sounds like; a closed bin. There is a lid on the top where you’re able to throw in any organic material you wish to turn into compost. Along with a lid is a door about one foot by one foot in size at the bottom where the decomposed material can be pulled out and spread around where you wish. These bins also have an open base so you can pull it up and let all your compost fall out in a pile.
This method could be argued to be the most simple form of composting. To pit compost, all you need to do is dig small trenches or holes where you directly dump your organic waste and wait for it to decompose. Your waste will gradually break down in the time frame from about six months to a year. This method is useful for people who want to compost but don’t want to see it at all. The ultimate goal when pit composting is really for people who are planning to grow plants in a new spot on top of where you’re pit is. This process can become awkward when digging trenches around your landscape or garden.

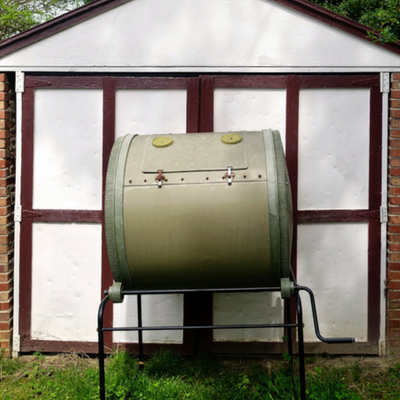
When you use a tumbler to make compost, you don’t need to invest as much labor. Tumblers are excellent for smaller gardens or urban areas where you don’t necessarily have the most space to work with. What they are is a horizontal trash bin with a door that opens and latches shut. This bin is supported by a standing structure with a handle where you can rotate the bin to mix its contents to speed up decomposition evenly. When using a tumbler, the materials do not touch the ground; you should add some soil to your mix to increase microbes which help break down your waste more efficiently.
People who are scared or disgusted by worms probably shouldn’t try to Vermicompost. When Vermicomposting you’re setting up a worm farm to do all the work for you. All you need is a 15 gallon or bigger bin where you add old newspapers, leaves, or straw on one side and your organic waste on the other. Once you have your contents throw in your worms and let them make you some high-quality compost. After a few weeks, the worms should have eaten all the organic waste then moved over to the bedding material you added. Just remove the ‘dirt’ from the one side and place in your garden, and the worms should be on the other side. Repeat the process time and time again.